Guitar painting: part 8 (done as hell)
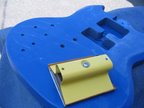
I was supposed to wait a month but I made it two and a half weeks. I wanted to have two guitars again so I could have a backup for gigs and honestly I had lost faith that this paint job was going to look good enough that a couple weeks of dry-time settling would make much of a difference. So I took off the hook and off I went wet-sanding:
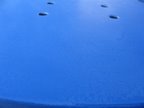
I went from 320 grit sandpaper all the way up to 1000. It was looking pretty scuffy -- which was the point -- though I wasn't sure if I had sanded the clear enough as there were still some semi-shiny spots. Eventually I managed to strip the paint off a couple of the edges. Now I've read that when this happens to paint the area and re-coat it with clear and wait a week or two and start again. But forget that noise, I'm finishing this bitch.
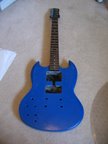
I went at it with the 3M Perfect-It Rubbing Compound and then 3M Swirl Remover:


Holy LORD is that shiny. Instantly the guitar starts looking like a professional job if you ignore all my screw-ups. I clean it off and bring it inside, take the masking tape out of it and put the neck on, partly out of fear that it wouldn't fit anymore. I managed to get it into place and everything seems cool:
It's looking fairly swank if I do say so myself. I then start to put everything back together. I decide not to put my new switch or pickups in yet, that I should try and put the guitar back together in its original state first as I've never done that before. It probably took me an hour and a half -- but all the electronics worked first try! Woooo!!
Re-assembled, I hang it on my wall and take a cruddy picture in bad light:
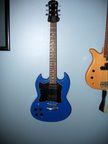
I'll try and take a nicer one tomorrow.
All in all, I'm pretty happy with it. There are many flaws if you look at it up close, but from even a slight distance it looks decent. There are lots of things I'd do differently if I had the chance, but I'm happy it's done and the idea of re-doing it makes me feel tired and lonely.